Moog Subharmonicon | How do I install the Subharmonicon in a Eurorack System?

Your Subharmonicon can be removed from its case and easily installed into a Eurorack system as a 60HP module. Before doing this, it is important to note that Subharmonicon draws a maximum of 360mA from a +12V rail. It does not use the -12V rail at all.
Make sure there is enough headroom on the +12V rail in your system to power the Subharmonicon.
You will need to know the current rating of the system’s +12VDC rail and the current draw of the +12VDC rail from all modules in the system combined. The sum of all current draw at +12VDC should NEVER exceed the power supply rating. Note that it is good practice to leave some headroom to reduce stress on the power supply.
Moog accepts NO responsibility or liability for improperly installed modules.
To install the Subharmonicon in a Eurorack System:
- Disconnect external power from the unit.
- Remove the eight black M3 screws on the front panel and keep them somewhere safe. You will need them again.
- Slowly lift the panel from the case, so that you can see the two cables going to the front panel module.
- Disconnect these two cables from the front panel. The module is now free from its enclosure
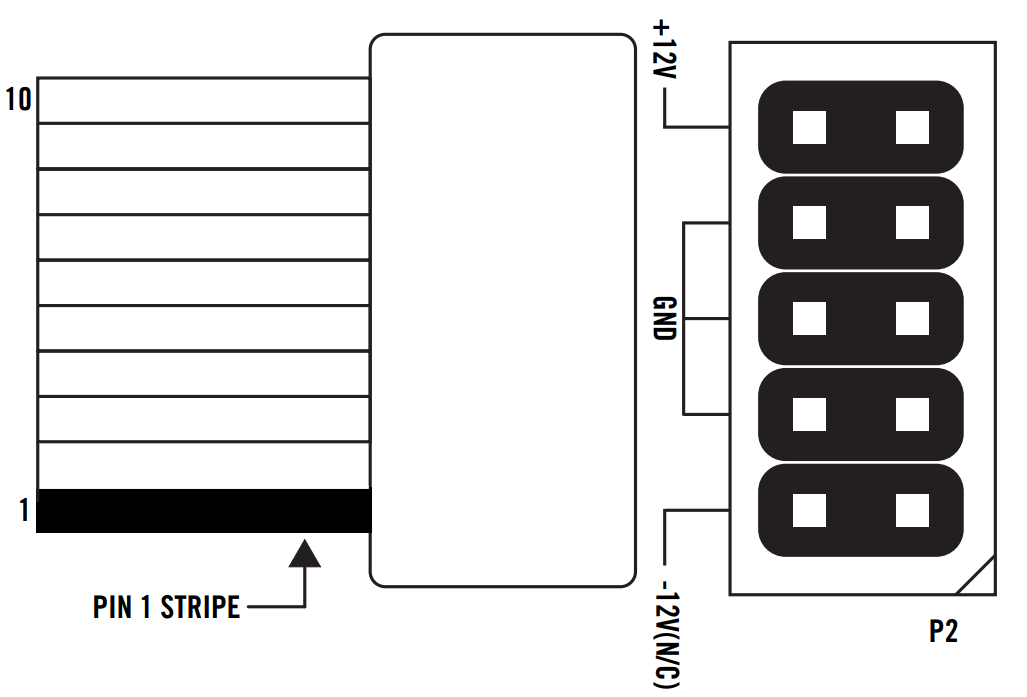
- Look at the back of your Subharmonicon module. There is a 10-pin power header on the back of the PCB that accepts a 10-pin Eurorack power ribbon cable (not included).
- Connect PIN-1 (-12V) of the power ribbon cable to PIN-1 of the Subharmonicon Eurorack power header. The darkened wire (typically red) on the ribbon cable indicates the PIN-1 (-12V) side of the cable.
- After power is connected, your Subharmonicon may be installed into the rails of the Eurorack system case with the eight black M3 screws removed in Step 2.
- Once fully installed, you may power up your Eurorack system.
Was this article helpful?
That’s Great!
Thank you for your feedback
Sorry! We couldn't be helpful
Thank you for your feedback
Feedback sent
We appreciate your effort and will try to fix the article